If you already own a truck, a DIY truck bed camper build is an inexpensive way to create a place to sleep wherever your adventures take you.
Our step-by-step tutorial will walk you through how we created a place for two to sleep in the back of our F-250. Our build includes plenty of storage space and could be used in either a 6-foot or 8-foot pickup truck bed.
We don’t share exact measurements because almost every style, year, and make of truck has different truck bed dimensions. Instead, we share plenty of pictures and provide detailed instructions. As with all DIY projects, the quality of the build and, therefore, its safety is up to the builder (you).
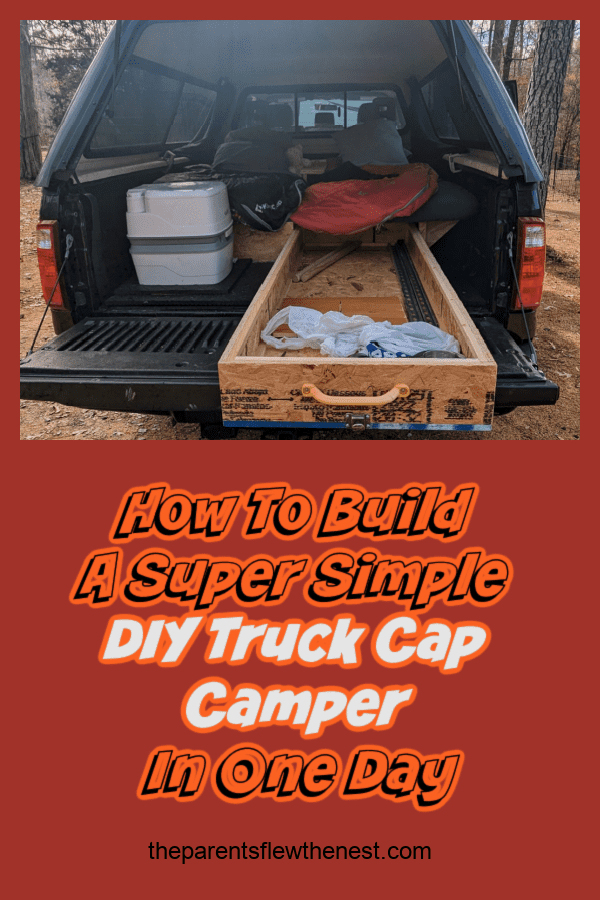
A Simple Guide To Building A Truck Cap Camper Using Basic Materials
(Links in this post are affiliate links. I will be compensated when you make a purchase by clicking those links. See disclosure page for more information.)
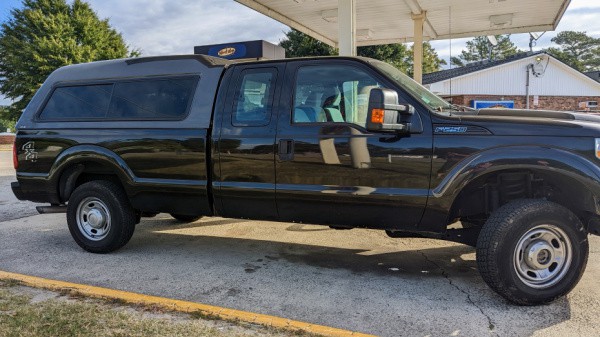
Step One: Purchase A Truck Cap
Now, this step is obvious, but in case you haven’t yet purchased your camper shell, I thought I would share a few tips on what type is best for truck camping and how to get one without spending a fortune.
Jack and I recommend getting a truck topper with a sliding window with a screen on both sides. You will want this for ventilation and airflow. If you find one on the used market with long sliding windows and no screens, you can fix it by creating screens, but that is added work. You need screens unless you like being bitten by bugs all night.
Get a fiberglass cap, not aluminum, to avoid condensation dripping on your head in the middle of the night. It would be even better if the inside is lined, as it looks nicer and provides an added insulation layer–but it is okay if it isn’t.
We recommend you consider how high of a truck topper you want. We are happy with our gently-used A.R.E. MX series truck cap with a mid-high roof. It offers the perfect amount of head space for our low-bed and storage area build.
However, having a few more inches in the rear end would be nice when we need to use our portable “throne.” If you, too, have an 8-foot truck bed, the A.R.E. TW series truck caps have added headroom at the end of them, which would allow using the potty without having to hunch over.
One last option that will affect your truck camping setup is whether you want a topper that allows you to keep your tailgate or one with a walk-in door. We use our tailgate for cooking and when we use our truck tent, it gives us an added two feet of floor space and more ventilation. But the walk-out door would make it easier to exit and enter your truck canopy camper. Pair it with these receiver hitch stairs and getting in and out would be easy-peasy.
Saving money by buying a used topper is pretty simple to do, as there are plenty of used ones on the market. Before you start looking, be sure to know your exact make, model, and year of the truck and the exact measurements of your truck bed, taken from side rail to side rail as well as tailgate to where the bed reaches the cab of the truck. Ask the seller to check the measurements before you make the long drive to purchase it, only to discover it doesn’t fit.
If your truck is brand new and you are the type to keep a vehicle until its life’s end, buying a new truck cap might make sense. It would allow you to match your vehicle’s color and pick out the exact features you want in your truck topper. Plus, you can have the camper shell professionally installed, reducing the likelihood of leaks.
A few truck topper companies include
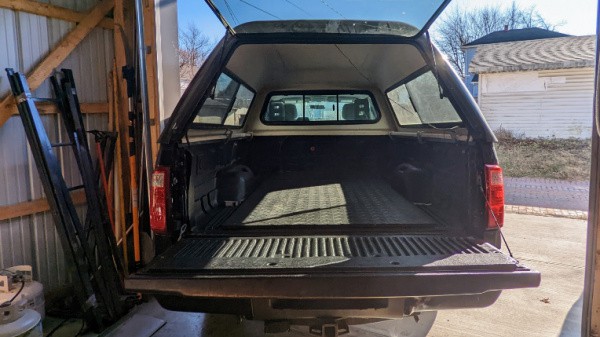
Step Two: Start With A Clean Truck Bed
With your truck topper purchased and on your truck, it is time to get started. The first step is to start with a clean truck bed. You want nothing in your way as you take and check measurements.
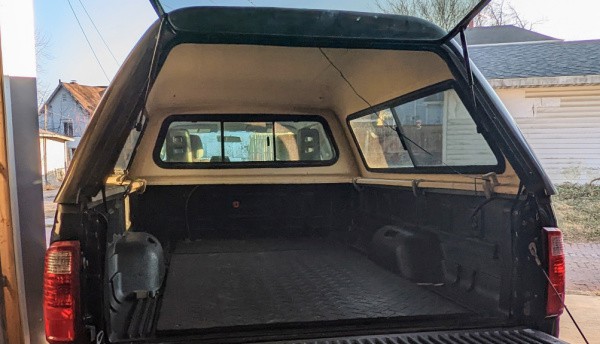
Step 3: Consider Creating A Non-slip Surface For Your DIY Truck Camper Build To Sit On
We have a horse mat in our truck similar to this one that is cut down to size. It isn’t 100% necessary, but offers added security as it reduces the stress on the bed-storage build while in transit by reducing slippage. It also provides an extra layer of insulation. Plus, if your truck bed is 8 feet like ours, it makes a softer landing space for your feet when you climb in and out of your camper.
You could also use gym floor mats or any other rubber mat that is large enough to fit the back of your pickup truck.
Step 4: Take Measurements And Gather The Right Materials And Tools
Now we get to the fun part! The build. The first step is to measure all the different dimensions of your truck.
Here is a list of interior measurements you need to take to create your truck cap bed and storage frame
- Length and width of truck bed wheel well to wheel well to obtain your base sheet measurements.
- Height of wheel wells–this will be the height of your storage box.
- Measurement of truck box sidewall to sidewall. This will be your bed platform size.
Now that you have your measurements, it is time to head to the lumber department at your local hardware store to pick up the pieces of wood you need for your build.
Here is a list of supplies you will need to create the removable platform
- We used four sheets of plywood. We already had the ¾ inch sheet of plywood we used for the base and used three sheets of ½ inch for the rest of the build to keep it lighter. You could purchase four sheets of 1/2 inch to save money.
- We used a 2×4 without knots for the supporting strips and cut it down to make ¾ by ¾ strips.
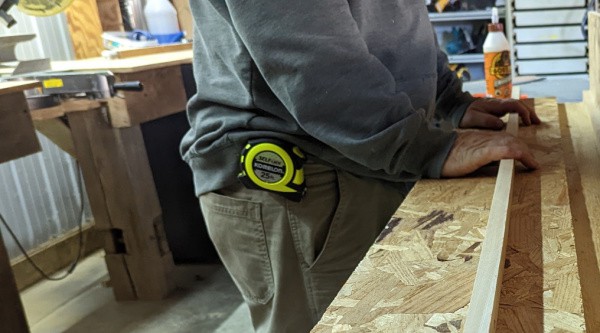
- Wood Glue. Jack loves all Gorilla Glue products and used their wood glue for the project.
- 1 1/4 inch screws.
- 1 1/4 inch staples, or nails and a hammer if you don’t have a pneumatic staple gun.
Here is a list of tools Jack used and alternatives you can use if you don’t have what he has
- Table saw or circular saw with a laser guide, or for even greater precision, you could purchase this rip-cut circular saw guide (make sure it fits your circular saw before buying).
- Miter saw—Jack used this to cut the triangular side supports, but you could use a circular saw. If you are not sure how to do that, here is a handy article by Instructables.
- Staple gun (pneumatic), or you can use 1 1/2 inch finishing nails and a hammer instead.
- Air compressor with hose–you won’t need this if you use a hammer and nails.
- Cordless drill–If you plan to cut out the holes in the bed supports with a hole saw, as you will see Jack doing so below, you will need a drill with some power to it. If you use a jigsaw, you can get away with a drill with less power.
- Measuring tape
- Pencil
- 3-inch hole saw–This hole saw set has good reviews and is reasonably priced. Again, you could use a jigsaw instead to cut the holes. Or you could not cut any holes in your supports.
Step 5: Measure And Cut The Base Piece Of The Sleeping Platform
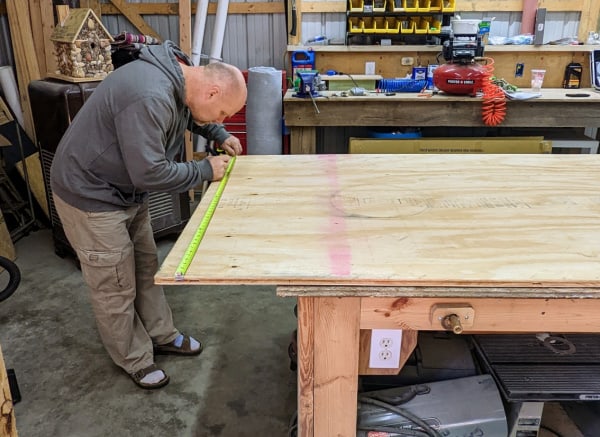
We had this piece of ¾ inch plywood left over from another project. The base can be made from ½ inch plywood to save money.
Our truck is full-sized so there was no cutting for this piece. In the picture, Jack is using the tape measure to plan the layout.
Step 6: Measure And Cut What Will Become The Supports For The Sleeping Platform And The Drawer
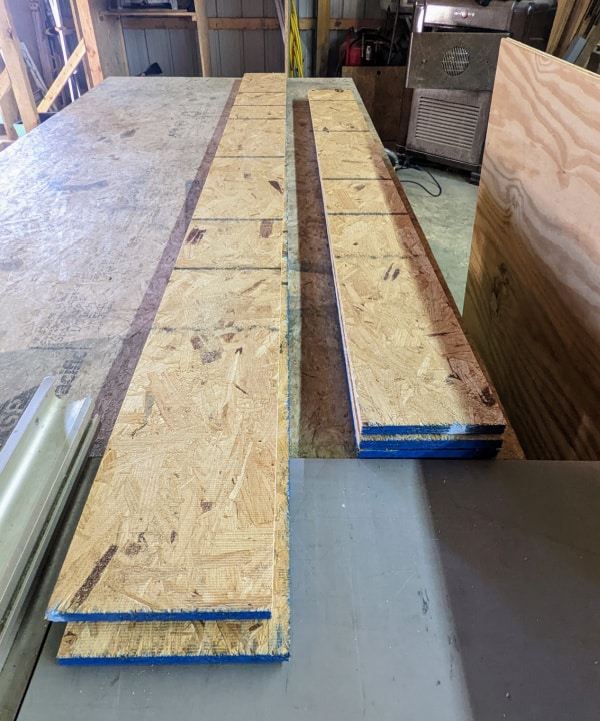
After measuring the wheel well, Jack decided on 7 1/2 inches for platform support height. This allowed sufficient height to clear the wheel well. Remember that all trucks are different; you will need to measure yours to figure this height out.
Step 7: Measure And Cut The Support Stabilizers For The DIY Truck Topper Camper Bed
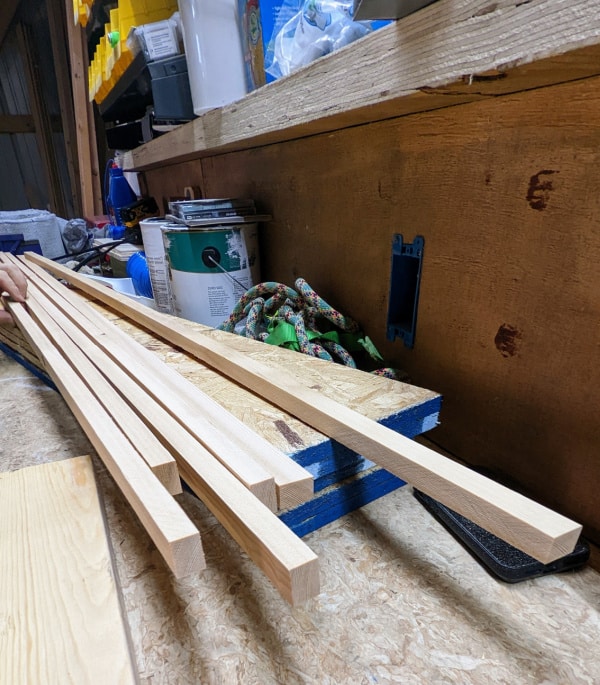
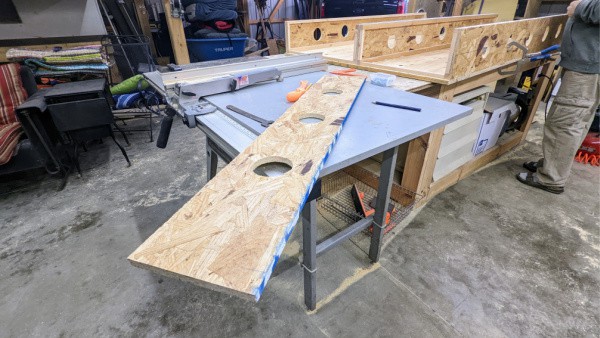
Using ½ inch thick plywood does not give enough surface area to join securely. So Jack used ¾ by ¾ inch support strips glued and stapled in place. He created these strips by running the 2×4 (without knots) through the table saw set at 3/4 inches. This requires several passes to reduce the 2×4.
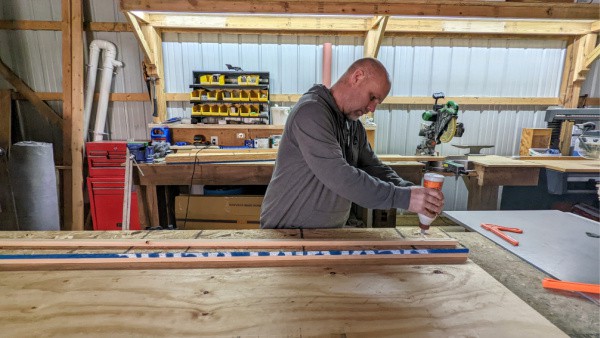
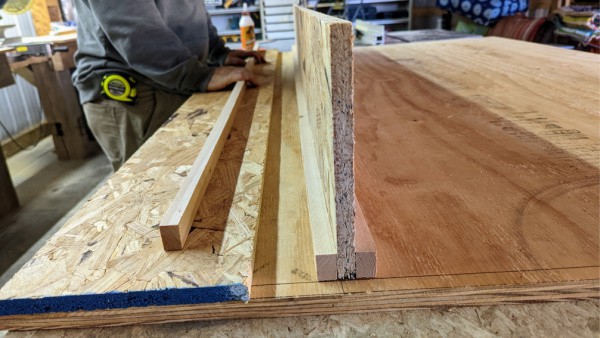
Step 8: Glueing The Stabilizers To The Platform Supports
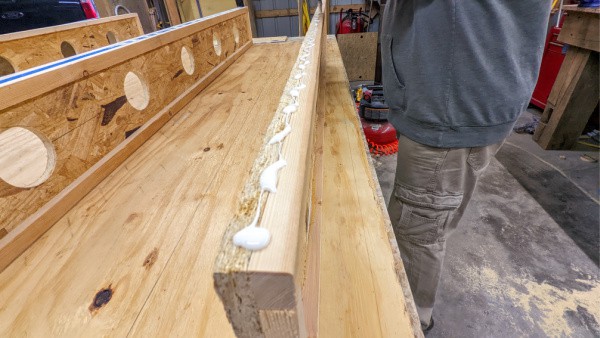
Glue and staple the 3/4 by 3/4 inch strips to the edge of all the upright platform supports.
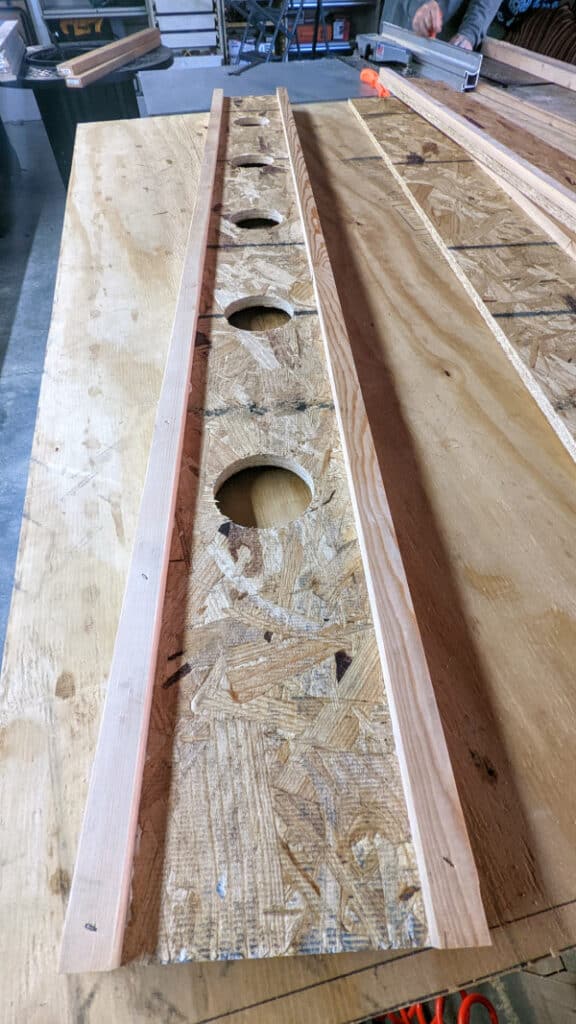
Step 9: Take Some Weight Out Of The Supports
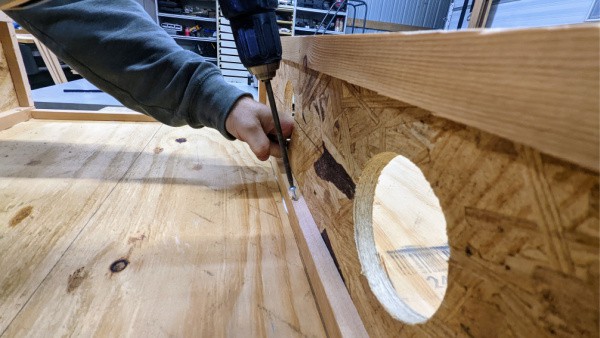
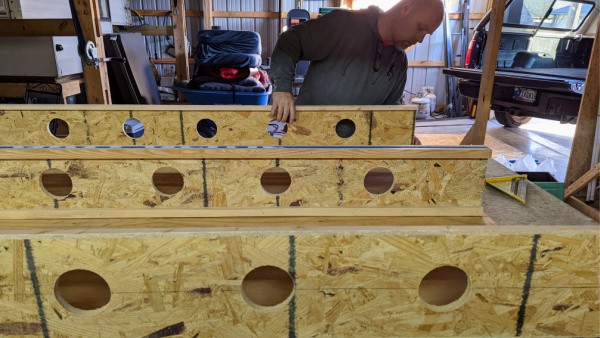
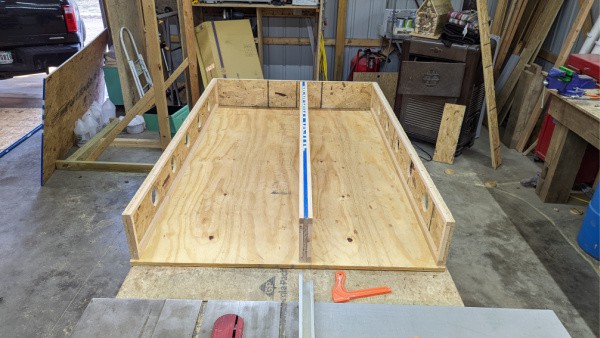
Jack drilled 3-inch holes every 12 inches along the length of the supports. These holes reduce the weight of the build and allow for greater airflow. He did this using a 3-inch hole saw that attaches to his drill. These supports are then glued and screwed in place.
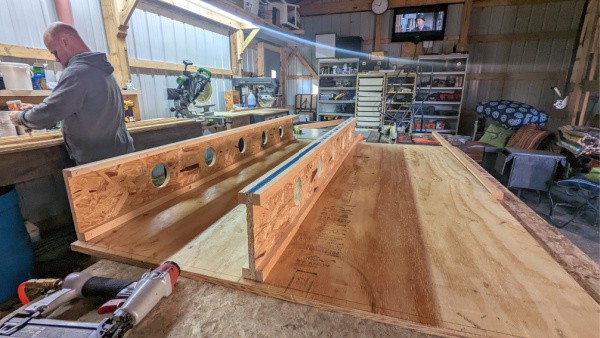
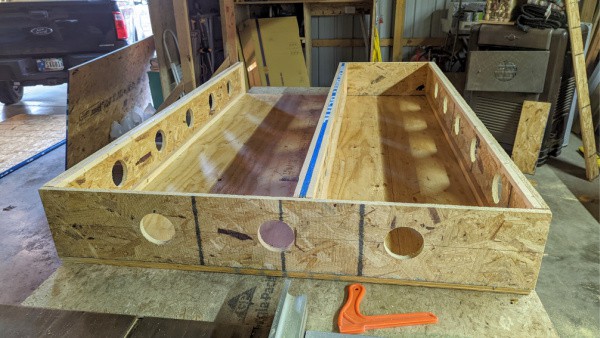
Step 10: Closing Off The Upper Part Of The Box & A Portion Of The Lower
The rear wall was placed to give support and a backstop for equipment storage. A portion of the lower half was walled off as well to start the creation of two storage cubbies. More on those later.
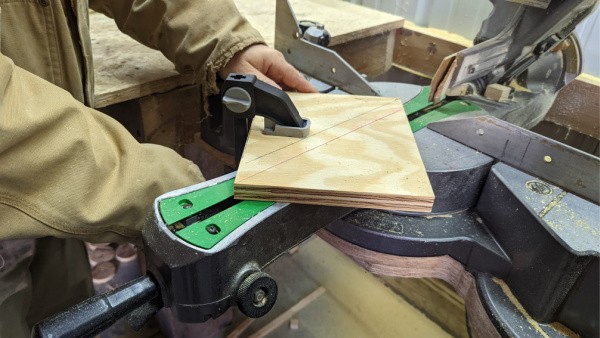
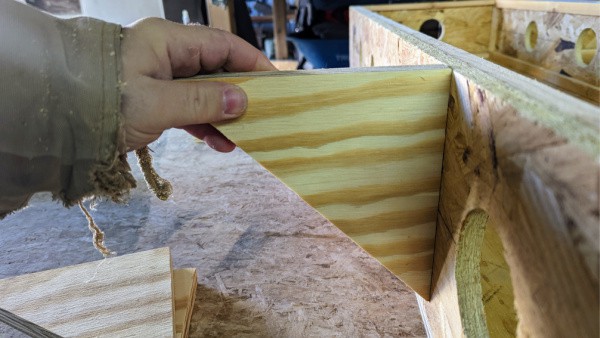
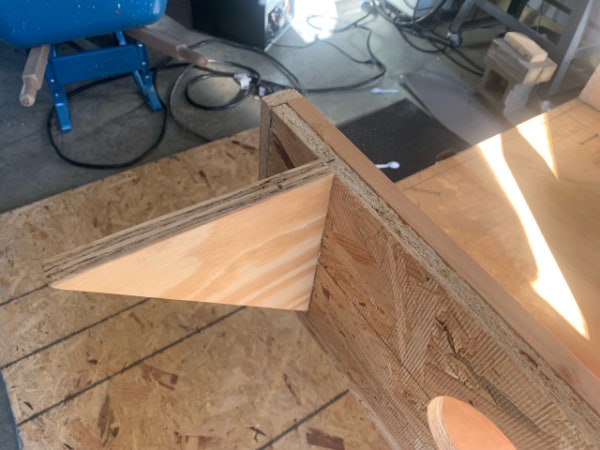
Step 11: Creating Side Supports Around The Wheel Wells That Also Reduce Slippage
An unsupported area is now between the storage wall and the truck bed wall. To correct this, Jack made triangular supports using his miter saw and then screwed them into place to support the top bed platform.
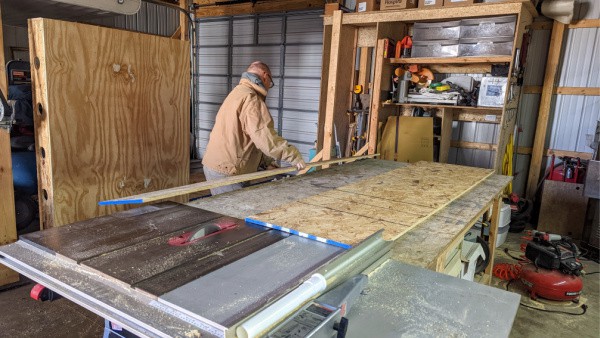

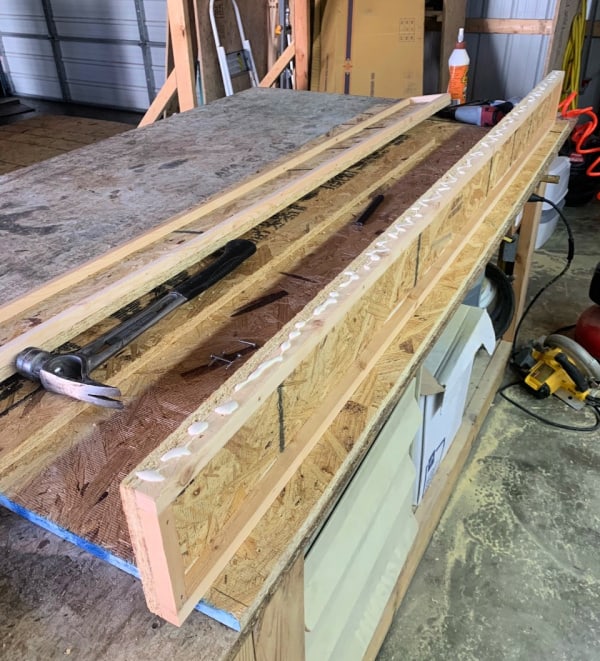
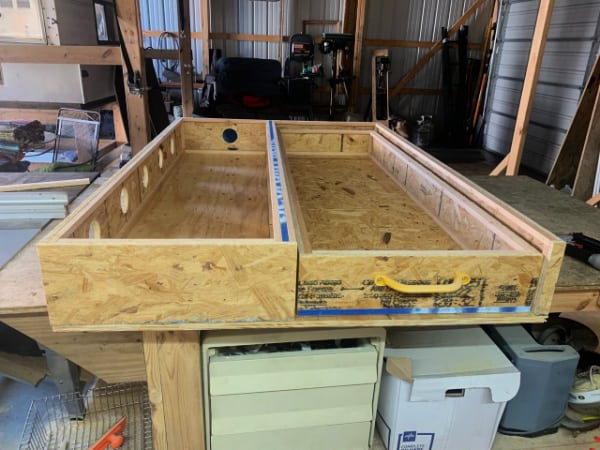
Step 12: Creating The Drawer
The floor of the drawer is a ¼ inch shorter on each side in width to allow for ease of sliding. Jack cut the drawer an inch shorter in height for the same reason. The walls were built the same way as the support walls.
We found that the drawer easily moves in and out of the bed box without the added expense of drawer sliders. However, if you store many heavy items in the drawer, you might want to shorten the sides even further to allow for the insulation of drawer slides.
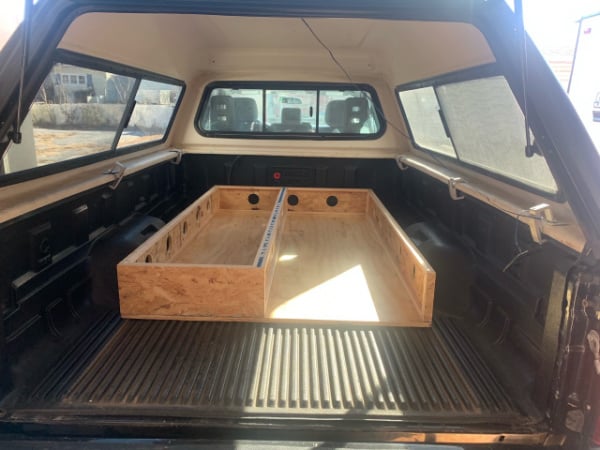
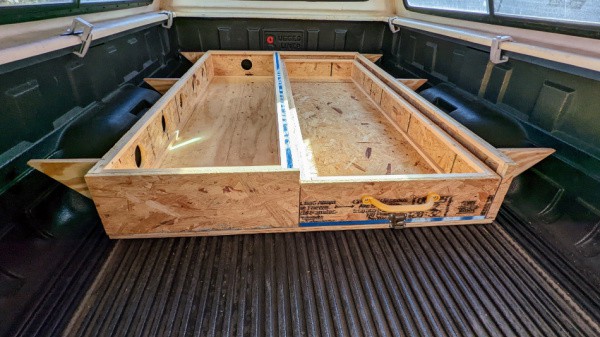
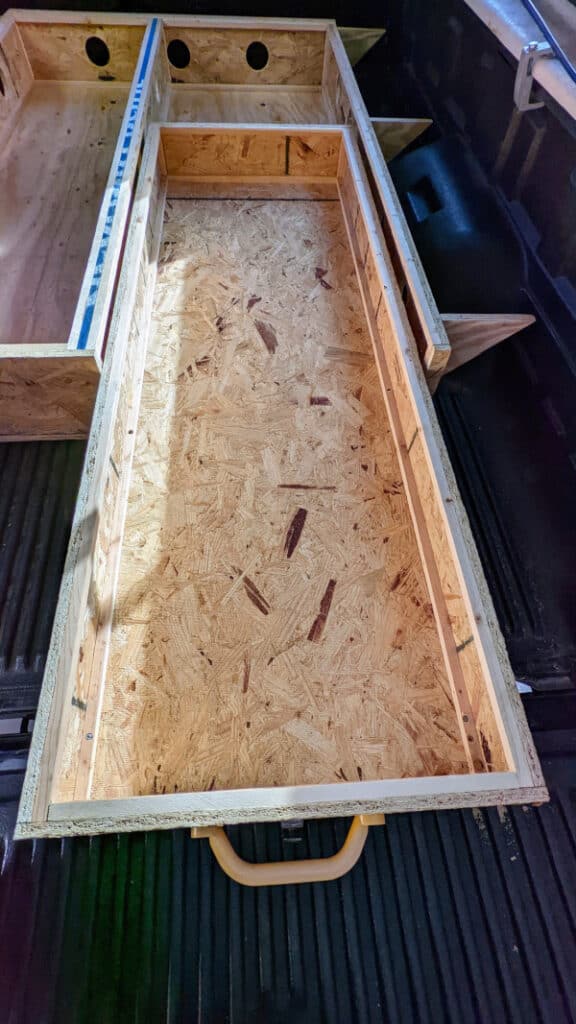
Step 13: Putting The Handle And Locking Mechanism On the Drawer
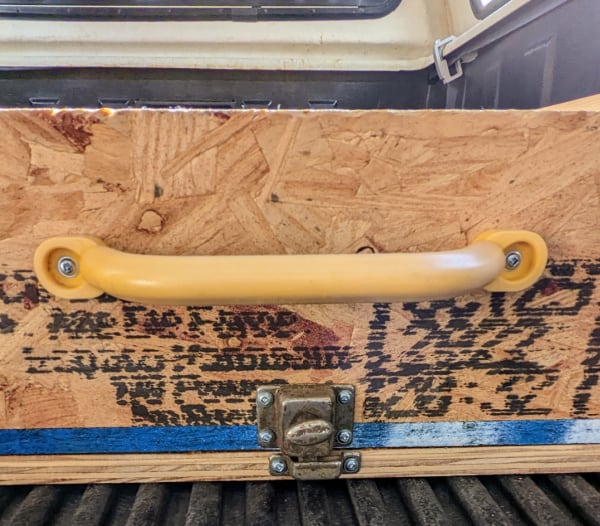
The handle came from an old playground Jack took apart and the locking mechanism came from a kitchen remodel we did.
If you didn’t take apart a playground and keep the hardware (are we the only people with a stash of old hardware?), here is a pair of playground safety handles with good reviews on Amazon. The nice thing about using playground handles is that they are durable and have no sharp edges. This locking latch system looks pretty close to the one we used.
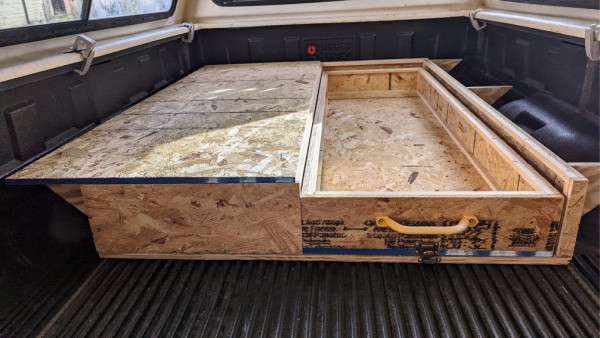
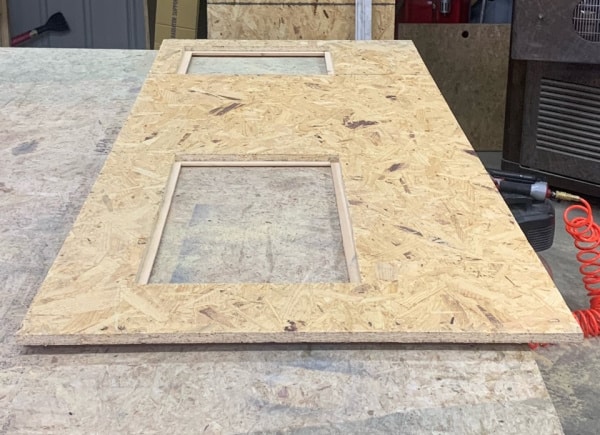
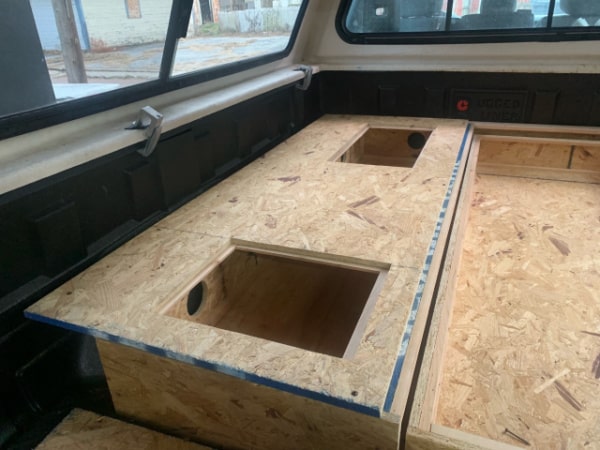
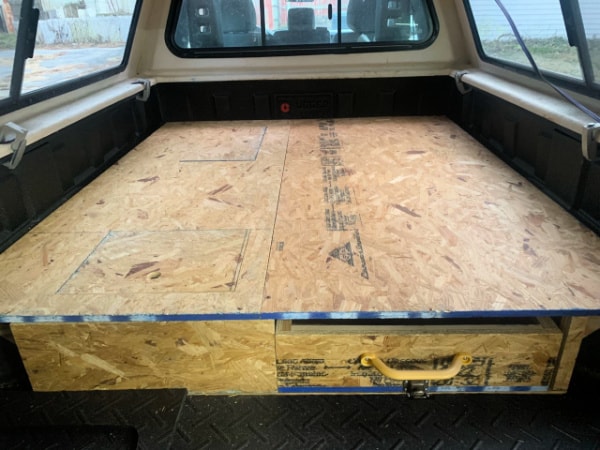
Step 14: Creating Cubby Hole Access To The Storage Below The Other Half Of The Bed Platform
After measuring from the truck wall to the middle support of the bed, plywood was cut to size. Two cubby hole accesses were cut out using a jigsaw and supports were glued and stapled to the underside of the plywood sleeping platform. A 1-inch hole was drilled into the lid to allow ease of opening.
We keep items in these cubbies that we don’t necessarily use every trip, but still like to bring along. Things like our dog’s lifejacket (he likes to jump out of canoes; this makes it easier to retrieve him when he does). The small electric space heater that we use if we have access to electricity on a cold night, a golf umbrella for rainy days.
In the drawer, we keep items we use every time we camp. Items such as our camp stove, cast iron frying pan, and other kitchen items.
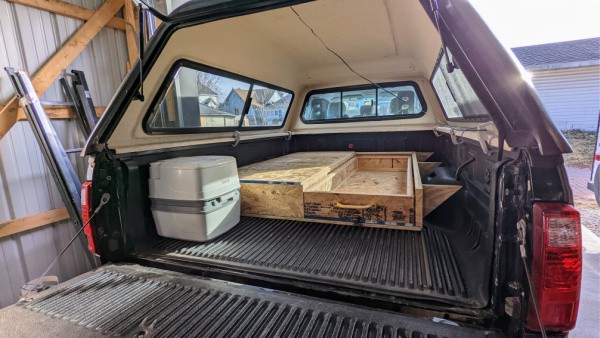
Why We Didn’t Make Two Drawers
I know that some of you are wondering why we didn’t do two drawers. The answer is that we both usually have to go to the bathroom at least once during the night. Having to go out in the night air and walk to the nearest restroom in the campground is not something we enjoy doing. Plus, a porta-potty has come in handy a few times when there either hasn’t been an outhouse at the start of a hiking trail or the one there is disgusting.
We have the Thetford Porta-Potty and are happy with how it works. We use it for number one at night and only number two in emergencies. Doing this keeps odors down and makes it easy to clean.
Since our bed takes up 6 feet of space and we have an 8-foot truck bed, our potty can easily be kept at the end of the bed, but that does mean one side of the storage under our bed platform build gets blocked off at the end and therefore can’t be a drawer.
If you are okay with not having a potty or you have a six-foot truck bed and, therefore, no room for one, go ahead and make two drawers.
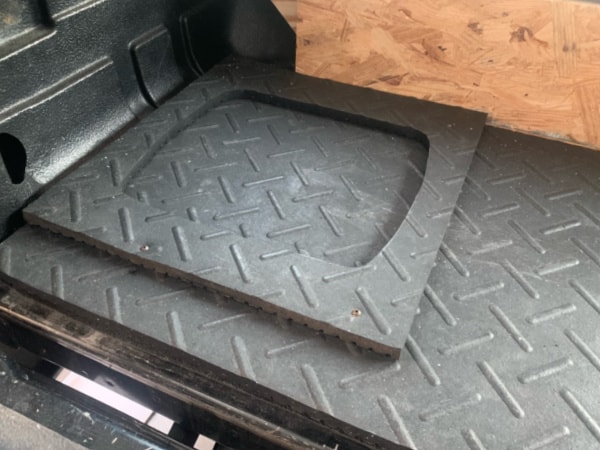
Step 15: Creating Something To Hold The Porta-Potty In Place
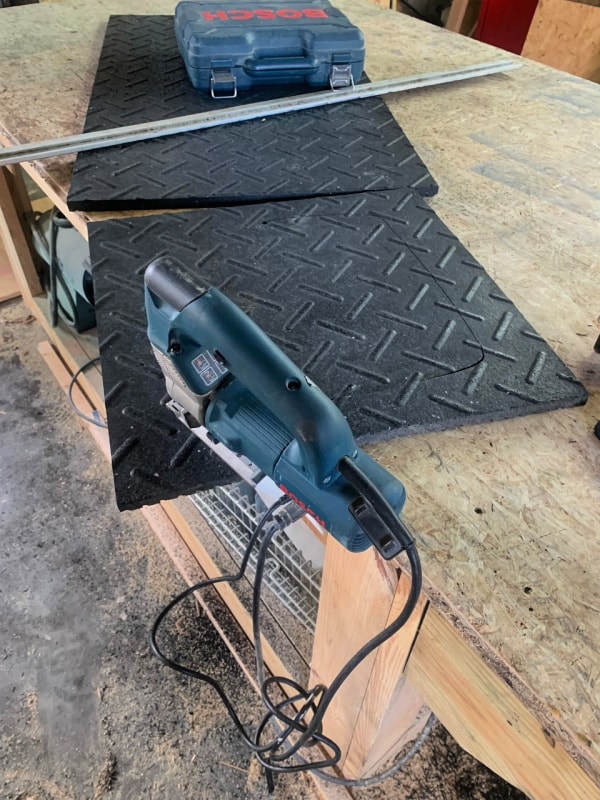
Jack used a jigsaw and a piece of the horse mat to create a hole for the potty to sit in. This stops it from moving around–something you don’t want! He did this by placing the potty on top of the mat and tracing around the bottom of the potty. He then used the jigsaw to create a hole that was just a bit bigger than the trace lines. After that, he screwed the piece to another piece of matting inside the pickup camper shell.
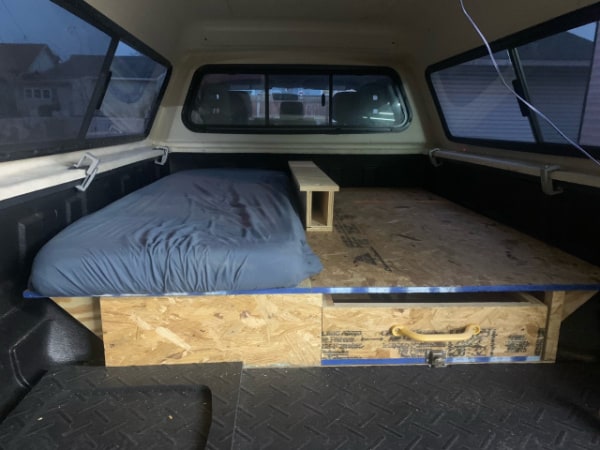
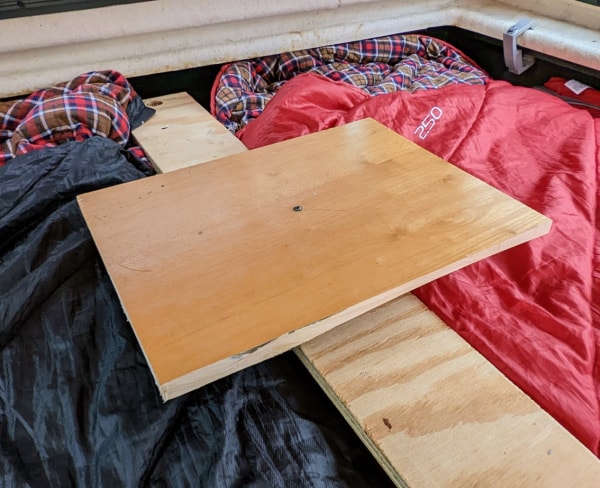
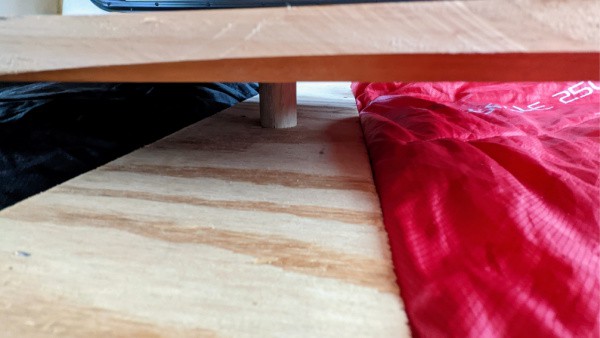
Step 16. Creating A Divider Down The Middle
This is another step that not all of you will want to bother with. For us, this divider does a few things.
- It helps keep our super comfortable mattress pads in place. Nothing is worse than your mattress slipping everywhere while you try to sleep.
- One of us regularly has trouble sleeping, and the divider is perfect for placing a phone or tablet for watching videos.
- The divider creates a space to place a removable table so that we can play card games inside the truck during bad weather or the winter months when it gets dark early.
Step 17: Creating Privacy Curtains
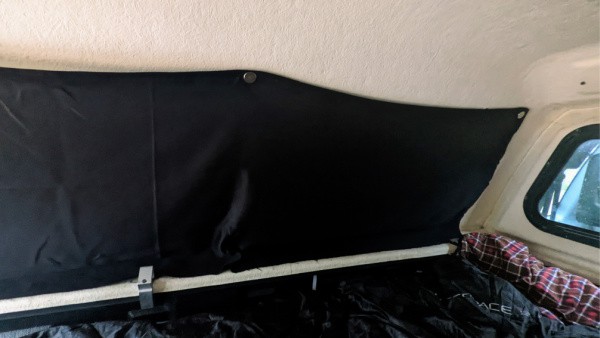
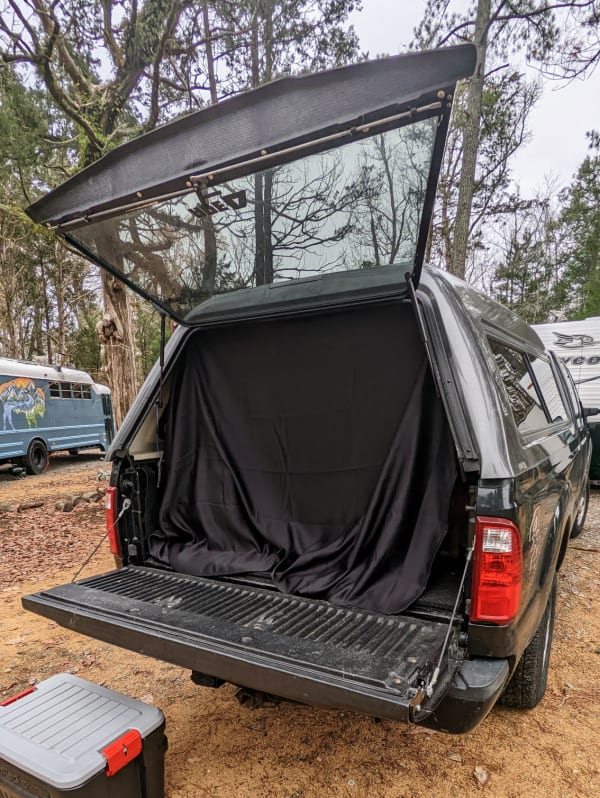
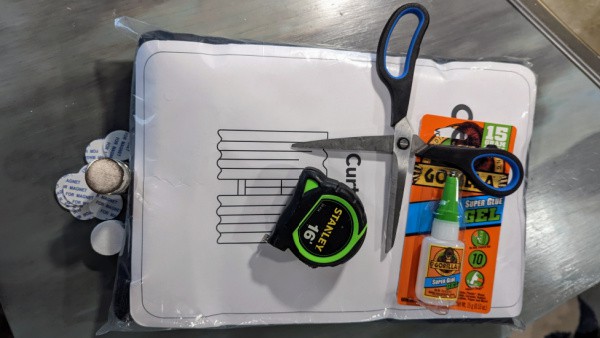
I bought a set of black blackout curtains and two sets of 20 magnets from Amazon for the curtains.
The magnets I bought have a sticky back. In case they don’t continue to stick (and some did fall off during our first trip), I bought some super glue (here is our favorite brand). As the glue backing fails, I plan to use the super glue to reattach the magnets to the truck camper.
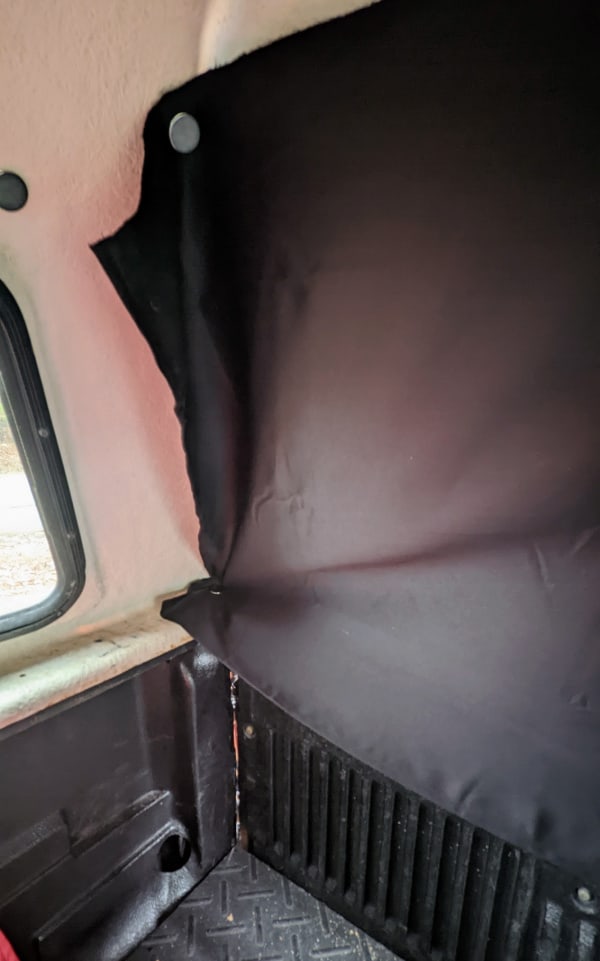
My first step in creating the curtains was deciding where to attach the magnets to the truck camper shell. I wanted them in areas where they would be flat and would not get knocked off as we move around in the tight space.
Once I had them in place, I used them to help hold the curtain panels in place so I could make a small snip at the end of the panels right where they needed to be cut. To do this, all you need to do is lay the fabric on top of the magnet and then another magnet on top -and bam, you can secure your curtains without messing with securing velcro to your fabric.
Once I knew where I needed to make my cuts, I took the panel out of the camper and to a space with a large clean flat surface for cutting.
I did the side windows first out of one panel. Out of the second panel, I cut the back door and, finally, the window that touches the frame of the truck’s cab.
The two panels were exactly what I needed. I had no material left over.
I want to hem the curtains next time I am at our home base where my sewing machine lives, but you can leave them unfinished if you want.
A List Of What Is Inside Our Truck Camper Shell
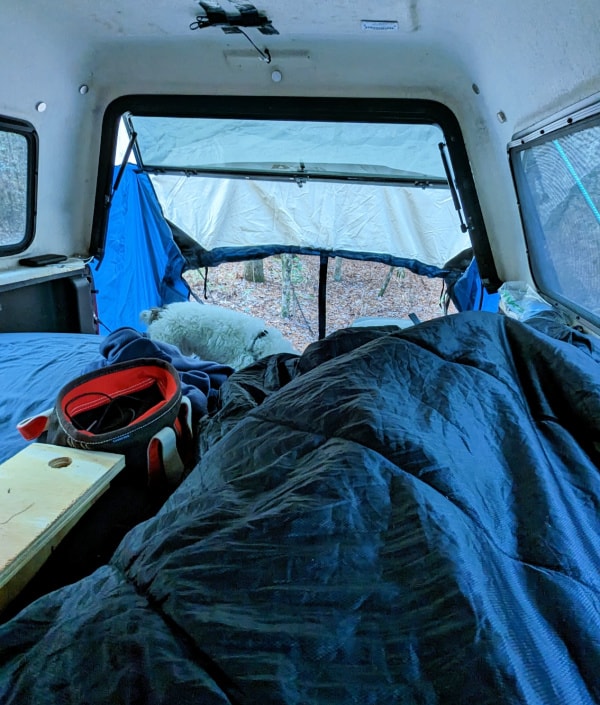
I am sure some of you looked at the picture above and wonder what that thing is stuck on the end of our truck bed. That is a DAC full-size truck tent. We bought it for our first truck topper camper built in our GMC Sierra.
It doesn’t fit our Ford F-250 as well as it fit the GMC. However, it still functions as it should. It allows us to sleep bug-free with the tailgate down and the truck topper door open. This gives us added floor space and increased airflow. The tent also makes it easier to enter and exit the camper.
We use it only in areas where you would find people tent camping, such as State park campgrounds. We don’t get it out when we spend the night in rest areas or Walmart parking lots.
Items We Use For Sleeping
- Two yoga mats–We use these under our mattresses to reduce slipping and add some comfort.
- We have had two single-sized tri-fold mattresses for years and they are still super comfortable. A must for all vehicle campers. This is the brand we have and they are available in a cot to a queen.
- Two KingCamp XL sleeping bags. These sleeping bags are incredibly roomy and warm.
- More pillows than I am willing to admit to!
Our Favorite Camp Kitchen Gear
- Two-burner Coleman stove
- Yeti mugs that we also use as bowls
- Set of 4 stainless steel camping plates that make spills from eating on our laps a thing of the past
- Stay Clean Silicone Scrubber that eliminates the need for dish rags
- Our 12-volt fridge that we keep in the cab of the truck. When we are not driving, we power it using this Anker portable power station.
Our Camping Comfort Items
- We have one USB rechargeable clip fan similar to this one and one battery-operated fan. This helps us get a good night’s sleep on hot nights. We keep the USB one going overnight using a battery bank like this one by Anker.
- I hate cold feet. On nights too warm for our heater but still on the cool side, I place a Sunbeam USB heating pad near my feet that is charged using a rechargeable power bank. I like it, but bigger ones that might be better suited for the job are available.
- A loveseat collapsable camping chair similar to this one. It is big and bulky, but we love it! It fits Jack and me and our 18-pound dog Dexter perfectly!

Enjoying Our Newly Built Truck Cap Camper
Our first trip in our newly built homemade truck camper was two nights in the campground at Merchants Millpond State Park, North Carolina.
We love the simplicity of our new truck cap build, although I miss the sink that our last truck topper build had. But I like that there is no setup or breakdown for using the bed. And this simple build allows us to use the truck bed for hauling items around without removing it. The center rail is easily removable if we should need the whole bed area to be flat for transporting something large.
We have talked about painting it black to match the truck bed and adding dark grey outdoor carpet to the top of it. The carpet would add insulation and a bit more comfort.
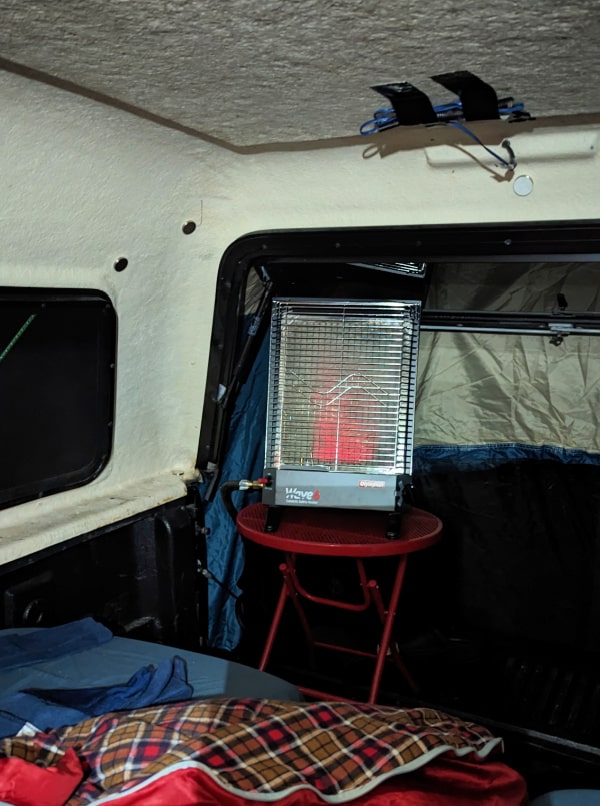
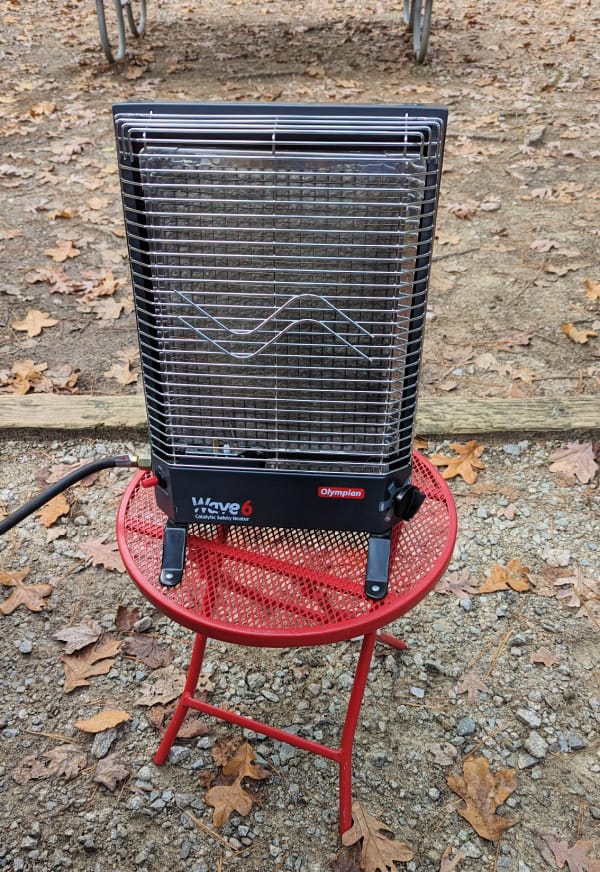
The fact that we have an eight-foot truck bed allows us to have room for a potty and a heater. We use an Olympian Wave 6, but it is overkill! Even on its lowest setting and both side windows of the truck cap open and a truck tent over the tailgate with its doors open, we were too hot! And it was in the 30s the two nights we camped.
I would recommend getting the Olympian Wave 3 for winter camping; it should be plenty powerful enough to heat such a small space. These are indoor-safe propane heaters; take all the recommended safety precautions, including setting up a carbon monoxide detector in your camper. Do not use this heater if you don’t have room to set it up far enough away from where you might accidentally bump it while sleeping. We did not use it in our shorter GMC truck topper setup.
This simple DIY truck topper camper is just what we need for weekend getaways while living in our 28-foot travel trailer full-time (Jack is currently a travel RN). Packing up an RV you live in all week to move for two days is a hassle. And when we get back from our weekend away, our 28-foot Jayco seems HUGE.
I hope that our plans help you create the weekend getaway camper you need no matter what your adventures are!
See how we built our first truck topper camper here. It had a sink, table, day bed, and sleeping space for two.
If you sleep in the back of your vehicle instead of a self-contained RV, you don’t qualify for a Boondockers Welcome or Harvest Host membership, but you can use Hipcamp to find unique campsites. Check out our post about our first time using Hipcamp (spoiler alert, it wasn’t our last time using Hipcamp).

Leave a Reply