Anyone can easily convert a minivan into a comfy DIY camper van without spending much money. If you already own one, it truly is the lowest-cost RV solution available to you.
Here are 16 items you need to consider when converting your minivan into a camper van. What you spend on these items is up to you. You might be able to use things you already own, creating a zero-cost mini-camper, or if your budget allows, you could go all out and make a luxury hotel room on wheels in the back of your minivan.
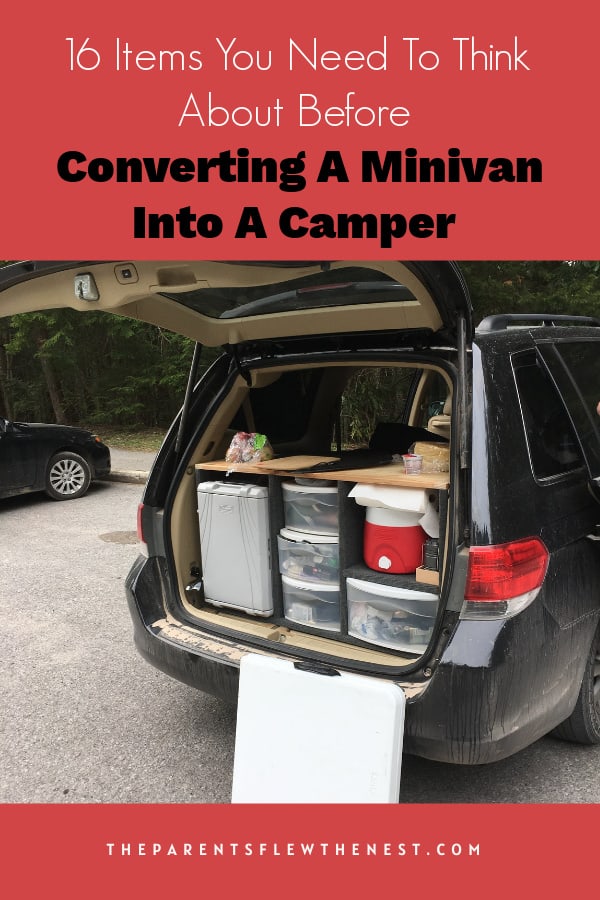
16 Items You Need To Think About Before Converting A Minivan Into A Camper
(Links in this post are affiliate links. I will be compensated when you make a purchase by clicking those links. See disclosure page for more information)
1. A Way To Store And Use Water
When you go camping, you will want water not just for drinking but for washing dishes, brushing your teeth, and washing up a bit.
We started with a 2-gallon beverage container with a spout. Since we only camp for two to three days maximum, bringing along a case of water bottles for drinking and using paper plates and bowls, two gallons was adequate for us.
Eventually, however, we began to feel guilty about the environmental impact of all the plastic water bottles we used for drinking water, so we upgraded to a 5-gallon BPA free water jug (these are much cheaper at Walmart with water in them and can be refilled) with a hand pump style top that requires no electricity. By placing a collapsible sink below it (ours is similar to this one), we can use it to brush our teeth and rinse off dishes.
Zero-cost alternative: If you don’t have a collapsable sink, you probably have a big bucket or bowl in your home that will work just fine.
2. Mattress
What We Did (a way to sleep 2)
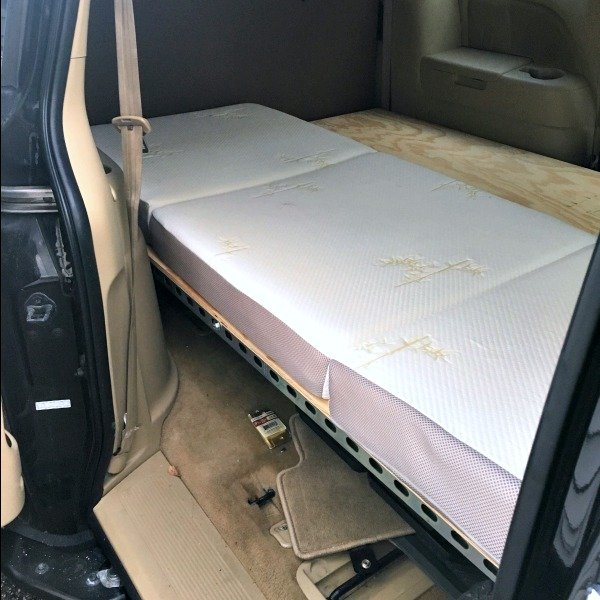
In general, the back of a minivan fits a full-sized (also known as a double) mattress perfectly. We had a Honda Odyssey and we used two of these super single tri-fold mattresses side by side–they worked great. It is not a memory foam mattress, but we have had them for several years now and they are still as comfortable to sleep on as they were when we first bought them.
We could have gotten the double size, but we found the two small ones easier to get in and out of the van and easier to store. That was important to us since our minivan camper had to come apart after our travels so that it could be used again for hauling people to and from places.
Another bonus of them being so portable is that they can quickly be brought out for overnight guests when you are at home. If you don’t want guests sleeping directly on the floor, they fit nicely on a basic sleeping cot like this one.
And if you find the minivan camper a bit stuffy on a hot night, you can drag the mattresses out and place them in a tent(we used them for tent camping on top of cots).
More Options (for one to two people)
If your budget is super tight, start with what you have. You could use a double air mattress, or two inexpensive backpacking sleeping pads (we have these, and they are comfortable enough for a few nights in a row of sleeping)
When my daughter camps in her van, she uses this camping cot topped with a foam mattress. This gives her a comfy bed with plenty of storage underneath.
Options For Those Who Want To Sleeping Space For More Than Two (up to six)
If you want to sleep more than two people in a minivan, you, of course, will need some of the passenger seats while driving.
What minivan you have will determine what will work best for you. If you have a van with Stow’N Go seats, such as the Chrysler Pacifica, congratulations–you have the most flexible space. If not, I would suggest taking out the middle captain seats, leaving them at home, and keeping the back bench seat for the passengers.
You have to get creative to sleep more than two in a minivan. If at least a few sleepers are smaller children, you have a few more options than those traveling with more than two fully grown humans.
Here are a few ways to sleep more than two in a minivan
Add a rooftop tent and you have space to sleep two teens or adults.
Create a platform to span the two front seats giving you space for a child less than 4 feet tall to sleep comfortably. Here is one that is meant for the front seats of a Sprinter Van to give you an idea of what I mean.
Use the space above the double bed in the back to sleep one to two children under four feet tall using folding 4-foot tables with adjustable leg heights like this one. Do not do this if your child rolls a lot in their sleep unless you can figure out a way to attach a safety rail to keep them from falling off.
3. A Foundation For The Mattress To Sit On
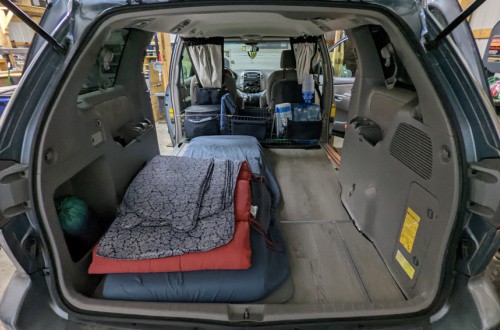
Most minivan floors are not level. So before you decide what to use as a foundation for your bed, you will need to figure out how you will make it level.
For our first build, we built a plywood platform bed frame that was higher at one end than the other. When placed in the van, it created a level bed for sleeping. The bed was hinged in the middle, allowing you to lift one side or the other to access the storage space under it.
If you are not up to a DIY build, I watched a YouTube video where a couple used this full-sized futon frame with a full bed tri-fold mattress on top, and it seemed to work well for them. Not only did it function as a bed frame, it also became a couch during the day –giving them a place to sit on rainy camping days. The only downside to such a setup is the loss of under-bed storage.
You could make up for some loss by building narrow shelves that fit into one side between the bed and sliding door. You lose one point of access, but you gain valuable storage.
If just one person is sleeping in the van, a cot with a block of wood under one end and a foam mattress on top is a simple no-build bed solution. You can secure the cot to the van by zip-tying the frame to the slots where the seats fit in. Place bungee cords between each of the legs of the cot to hold the stuff stored under it in place while driving. Plastic drawers like these would work well under the cot. This setup is super simple to pack up and put away when you are done camping.
4. Window Coverings
Window coverings, when done right, add not just privacy but a bit of insulation from the heat and cold.
We have tried two different types of window coverings before deciding that a combination of both works best.
First we tried black blackout curtains clipped to a rope sideways using small binder clips. This was a very last minute, “Oh my goodness, we forgot about curtains,” idea we had on our first trip in our minivan camper. We strung the rope through the handles around the top of the side walls of most minivans. It worked, but curtains hang straight down, and minivan walls are curved, so you lose a fair amount of indoor space to the curtains.
Before our second trip, we made window coverings using the following supplies:
- Reflectix (our van took just over one roll)
- Lightweight black fabric (we got ours from Joann’s using a 50% off coupon, of course)
- Brown kraft paper roll (we used some that came in an online order, we just smoothed it out)
- Masking tape
- Black fine tip sharpie
- Sharp scissors
- Gorilla brand black duct tape (my husband is obsessed with Gorilla brand, he says nothing beats its high quality)
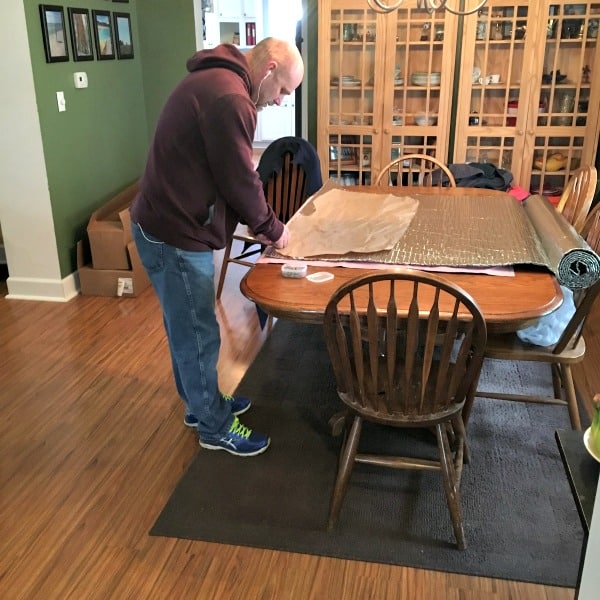
Once we had all the supplies gathered, my husband used the kraft paper to trace each window in our van to make templates for the Reflectix. To keep the paper from moving, Jack placed a few pieces of masking tape here and there as needed on the window and paper.
He then cut out the templates and used them to cut the Reflectix to size. After that, he cut a piece of fabric using the paper templates as a pattern, cutting the fabric roughly one inch bigger than the template all around.
He used the spray adhesive to glue the fabric to one side of the Reflectix (the side facing out of the van) and then trimmed the excess material. The last step was applying duct tape around all the edges of the window coverings so that it was half on one side and half on the other.
The window coverings stuck to the interior side of the van’s windows like magic. Well, not quite magic–it did take a bit of fiddling to get them in exactly the right place–but once they were in, they stayed in really well.
The one covering the front windshield was the only one that tended to slip a little at night. The windshield in our Honda was massive and did not seem to fit mass-produced windshield sun covers, so we were hoping our homemade one would work, and it did–sort of.
We now have a Toyota Sienna minivan, and in it, we used curtains behind the front seats and window coverings on the rest of the windows. Although we don’t use it for camping (we bought a secondhand truck camper), our daughter does and she says the combination is working well.
A low-budget solution
Use curtains or sheets you already own and hang them using string, rope, or a bungee cord behind the front seats.
Find a few cardboard boxes big enough to work as covers for the back windows, cut them to fit, and then use a can or two of black spray paint to paint them black.
The cardboard will get wet with condensation, but you can lay them around the van to dry.
A No Sew Solution
WeatherTech sells a window shade kit for
You can also find custom-made window shades for most minivans on Etsy.
5. Window Screening
You will want some way to circulate fresh air through the minivan camper while sleeping. If you don’t, you will get a lot of condensation build up in the interior of your van, which could lead to nasty issues like mildew. Of course, fresh air means opening a window, and opening a window allows mosquitoes to come in.
Our solution to this problem was to buy a pair of these car window screens. They were a bit short for our van’s front windows, but they allowed us to leave the front windows down several inches. They are a well-made and inexpensive fix. Since we bought them, they are now making bigger ones that are better suited for minivan windows.
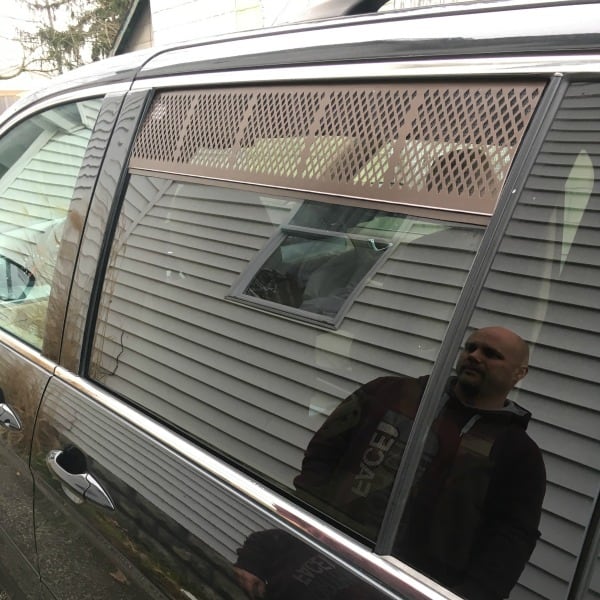
Another thing we did was cut plastic snap-in gutter guards to fit the windows on the sliding doors of our van. Ours rolled down and were relatively straight compared to the curved front windows. We spray-painted them the same color as our van. Both edges of the gutter guards had a groove that fit our windows perfectly. We got them in and then slowly rolled up the window. It did take a bit of work to get them in place, but when they were in place, they worked beautifully, letting air in and keeping the bugs out.
In our Toyota van, the gutter guards didn’t fit, so my daughter has used these magnetic screens meant for patio doors. She wraps them around the sliding door before closing them and places the magnets on the frame. It works in a pinch, but she is looking at better solutions. I noticed that this company sells tent-like passenger door coverings for those who sleep in their SUV on Amazon, and in the comments, I found a few people who say they work well on camper van conversions too.
If your van has a moonroof, it is the best window to keep open a bit if you are camping in a Walmart parking lot or rest area since no one can see that it is open unless they jump on top of your van. They sell screens with magnets to hold them in place that fit most sunroofs or moonroofs.
6. How To Keep Comfortable Sleeping–Beyond Your Mattress Choice
Bring whatever bedding helps you get your best sleep. We like our bed set up as close as possible to the one we sleep on at home. That means no sleeping bags for us. We want a down comforter and a set of sheets. We bring the pillows off our bed at home.
In Hot Weather
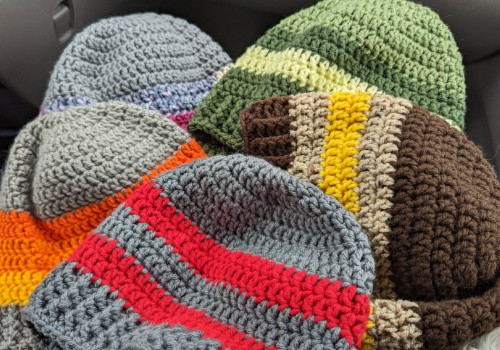
We slept with a top sheet and a lightweight crocheted blanket if the weather was hot. We also bought a small USB rechargeable fan to help circulate the air.
If your budget can fit it and you know you will have access to electricity on hot nights, consider getting a portable air conditioning unit. Place it behind the front seat and cut a board to fit your front window, with a hole in it that fits the unit’s hose. For under $400, your van now has a A/C for super hot and humid nights.
In Cold Weather
If the weather is cold, we find sleeping with a sock hat (called a toque if you are Canadian) and socks on helps keep you warm.
For a recent tent camping trip in cold weather, my daughter and I purchased hand warmers and just before we went to sleep, we activated them and stuck them in our socks to keep our feet warm. They worked well. You could even sew pockets on your fitted sheets, so they stay right where you want them all night.
Another idea is to boil water thirty minutes or so before you want to go to bed, place it in a Nalgene bottle (make sure to screw the lid on tight), then put it in your bed to warm it up before you get in.
You can do this with a hot water bottle too, but it is just one more thing to pack and you have to be careful not to get the water too hot! (hot, but not boiling).
Some people use small electric or propane heaters, but I don’t recommend them as minivan campers are small, and it is too easy to knock them over and cause a fire. Plus, there is the possibility of carbon monoxide poisoning with propane heat. With the proper blankets and a sock hat, my husband and I have kept warm in temps as low as 20 degrees Fahrenheit.
7. A Way To Keep Food Cold
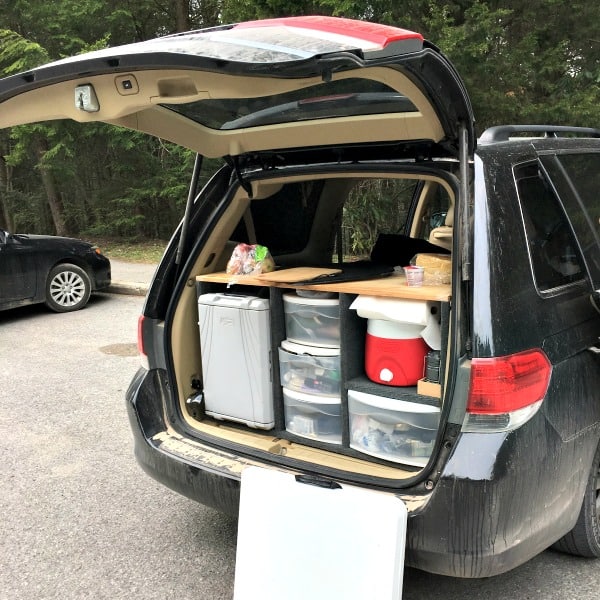
Unless you are eating out for your entire road trip and purchasing all your beverages already chilled, chances are you want a way to keep food cold when you camp. We bought this 12-volt iceless cooler, but after camping a few times, I wished we had just bought a cooler that requires ice.
Why? Because when we were not driving, the cooler was not getting the power it needed to keep the food cold. Purchasing a portable power station, like the Jackery, would fix this problem. However, getting one large enough to power a 12-volt cooler isn’t cheap.

8. A Way To Cook, Prepare And Eat Food
If you love to cook, you might want to create the ultimate kitchenette in the trunk area of your minivan.
Or perhaps you prefer to keep things minimal and bring along a backpacker’s stove, some dehydrated meals, and a spork.
Either one is fine, but it will affect your build.
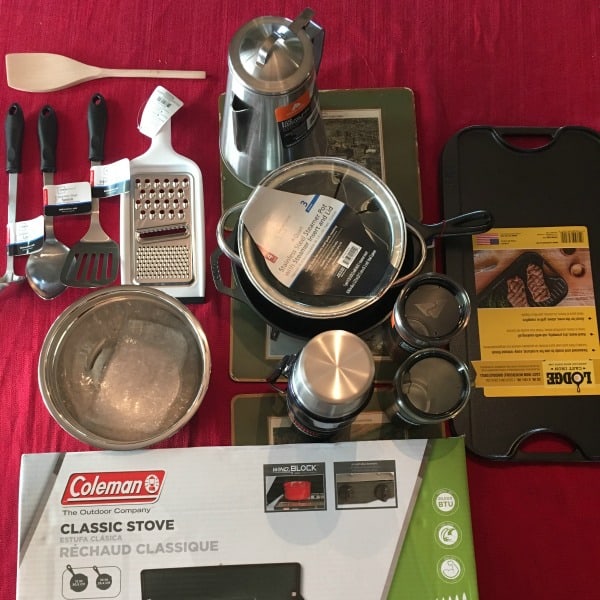
Here is what we bring along for cooking, preparing, and eating meals no matter how we road trip
- a classic two-burner propane stove for cooking our food
- Four forks, knives and spoons, and a few cooking utensils that we stick in a zippered bag
- These metal plates make eating on your lap mess-free
- Stainless steel coffee mugs with lids that can also be used as bowls
- a box of assorted ziplock bags for leftovers
- tinfoil
- two roasting sticks for s’mores or hot dogs over the fire
- A small pasta pot with a lid
- Silicone hot pads
- Lodge cast-iron frying pan
- A lighter
- Vaseline and cotton balls to use as a fire starter
- A roll of paper towel
- A kettle (this is our luxury item, we could boil water in a pot for our tea and coffee, but a kettle makes it so much easier to make pour-over coffee)
- A collapsible silicone pour-over with a few coffee filters
Again, most of these items you probably already own. For the first few times we went camping, I would grab what we needed out of our kitchen and put it back when we were done. However, that does get old if you camp frequently.
9. Places To Store Supplies
In a minivan-to-camper conversion, there are two main places for interior storage. One is under the bed, and the other is in the trunk. In our original minivan camper conversion, we had storage in both places, and yet we struggled to get everything we wanted to bring for the weekend to fit.
This is one of the top reasons we switched from #vanlife to truck camper life. It seemed like a minivan conversion had enough room for one, but was a bit tight for two. Not to say that two people or more can’t successfully do van life in a minivan; they can, but they need to be minimalist packers–we are not.
Here is what we learned about storage when we had the minivan build: you need a defined space for everything and to keep everything in its space.
The second thing we know is that each time you head out, you will figure out a better way to store items than you did the last time so don’t spend a fortune on organizing supplies during the building stage. Use what you have until you are 100% sure you know what you need to bring and how to best store it in the van.
Three Spots For Additional Storage.
You can utilize the interior ceiling of the van with a cargo net.
Add a rooftop soft carrier bag (this one has good reviews) or a hardshell rooftop carrier to the top of your van.
If you have the budget for it, consider adding a hitch cargo carrier to the back of your van. Before you do this, consider the clearance of your vehicle as you don’t want to have the carrier scrape the ground.
10. Cooking Prep Surface
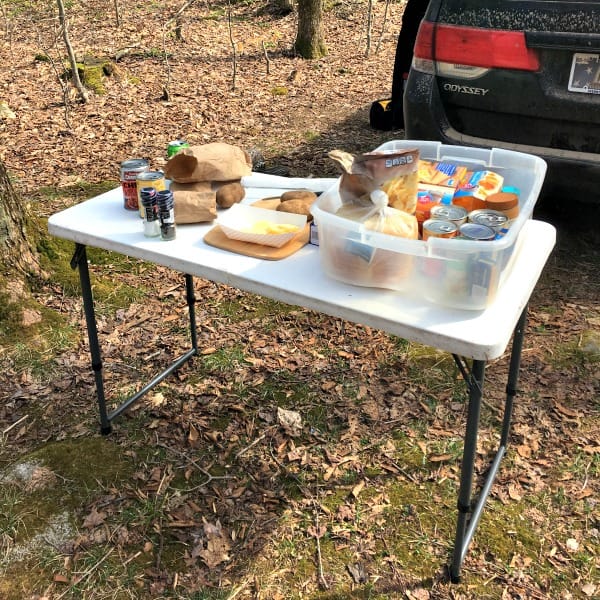
If your build has a rear kitchen without countertop space as ours did, make sure to bring along a large-sized cutting board that you can plunk down on a picnic table and use as a clean surface to prepare your meals. You also might want to bring a vinyl tablecloth to place between your cutting board and the public picnic table if you don’t like the idea of putting your cutting board directly on a surface that has been used for who knows what.
Of course, some places might not have a picnic table, so pack a table that can fit your camp stove and cutting board. We brought along a folding camp table that adjusts to 3 different heights. It fit between our trunk kitchen and the trunk door of our van and stayed put when we opened the trunk, thanks to a bungee cord.
If we ever build another camper van, we would ensure that there was an indoor countertop that could allow for the inside preparation of food on rainy, windy, or super cold days.
11. Power Source
We didn’t have any source of power when we minivan camped except for when we were driving. When driving, the 12-volt outlet in the back of our van powered our iceless cooler and the outlets in the front of the van charged our phones.
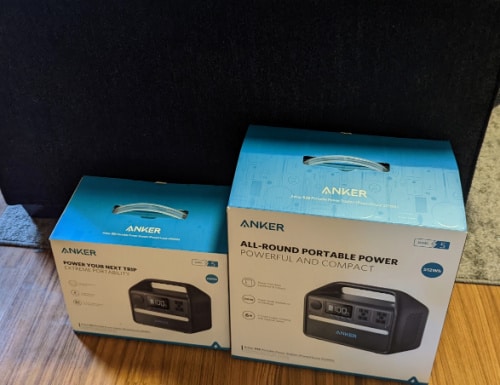
However, if we were to do another build, we would include a portable power station to power the fridge at night and at other times when we are not driving.
12. A Source Of Light
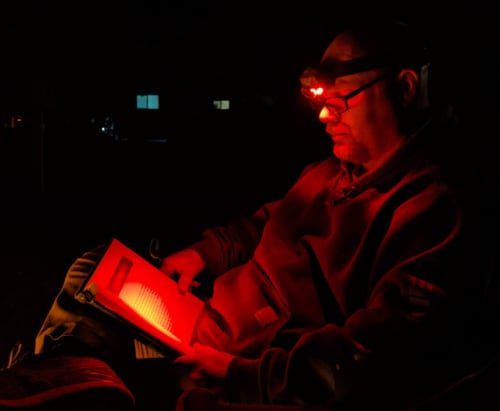
You need to consider what you want to use as a light source at night. We bought these lanterns and are happy with the soft yet bright light they provide; we still use them in our truck camper. We like that they use batteries as it is nice to have something that doesn’t need to be recharged during our trips; however, you could use rechargeable AA batteries if you want to be environmentally friendly.
Another way to avoid yet another piece of gear that needs to be charged is to purchase a solar lantern. This one on Amazon has good reviews and can also be used as a phone charger.
13. A Bathroom
TMI warning. In each of my vehicles is a small zippered bag containing an empty glass jar with a tight lid, a roll of toilet paper, and a plastic sandwich bag. This is my emergency toilet for #1, which has come in handy more than I thought it would.
Why share this? Because it is a free minivan-sized backup toilet should your plan to use public restrooms fail you. It doesn’t work for #2, but those emergencies don’t happen as often. If you have more problems with that, then an ice cream pail lined with a plastic bag is a free solution.
Consider making space in your build for a cassette toilet if you have a larger budget. We have one in our truck camper and find it low on smells and mess-free to empty.
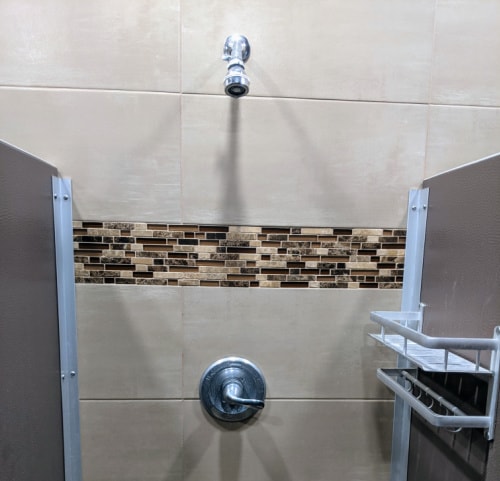
14. A Way To Get Your Body Clean
There are so many places where you can grab a shower. Local community gyms often offer day passes or even shower passes. Larger truck-stop-style gas stations like Pilot or Love’s have showers you can pay to use. If you already have a membership to a chain-style gym, you may be able to use it in other locations to take a shower or upgrade it so that you can.
If you are planning to stay at established campgrounds, all but a small percentage of them have showers available for your use for either free or for a small fee.
In a pinch, hot water and a soapy washcloth get you clean enough, and if that isn’t possible, baby wipes are a camper’s best friend.
Dry shampoo can make it possible to look good even though you haven’t washed your hair in a while.
If you have the space, a portable rechargeable shower head and a collapsible bucket (we have this one and love how it packs down so small) work to wash your hair and body. Heat the water on your stove to the desired temperature, place it in the bucket, put the shower head in, turn it on, and wash that trail dust off.
15. A Way To Hold Your Spot
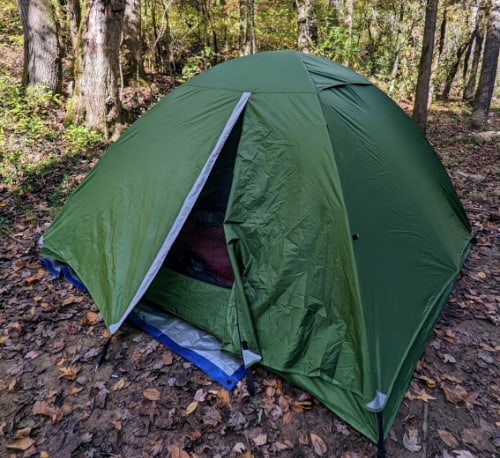
If you plan on camping at first come, first serve campgrounds, I recommend carrying along a small, inexpensive tent to hold your spot while you are exploring. It will also allow you to shift some items out of the camper at night for a less crowded sleeping space.
16. A Few Luxuries
If you have room in your budget and think these items are worth the extra cost for the added space and comfort they will bring to your camping trips, go for it!
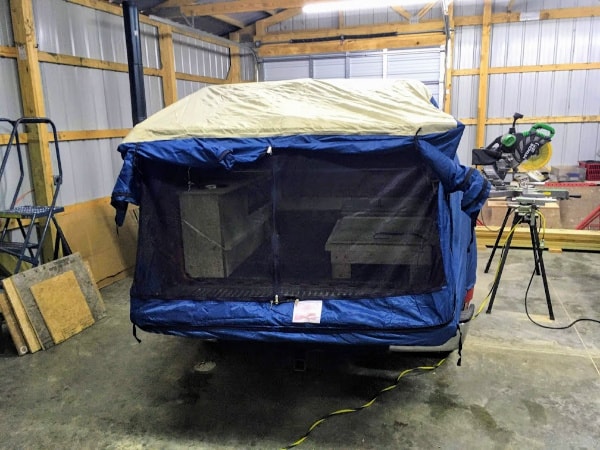
This tailgate tent has a few picture reviews that show that it fits a minivan well. It will give you protection in the rain if you build a full kitchen into the rear area of your minivan camper. It would also provide more ventilation on hot nights. Reviewers who traveled with dogs said it makes a safe place for their dogs to sleep near them at night, but not on them.
If you have a rooftop rack or are willing to add one, a side awning will give you a dry area to get ready for the day when it is raining. It will also provide shade on sunny days.
There are several different types available, from the simple and relatively affordable ones that cover the sliding door area to the expensive but expansive ones that cover the side and back of the vehicle.
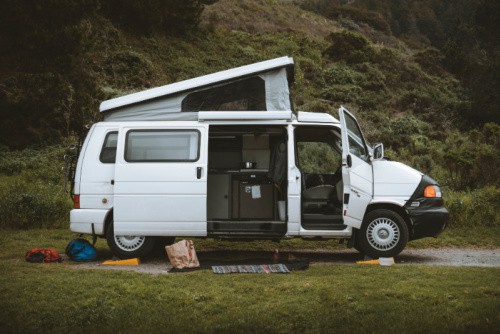
I wouldn’t do this last suggestion to an older minivan, but if you are investing in a new one and plan to use it as a mini motorhome for years to come, then it might be worth the cost for the space and comfort you gain. You can replace the roof of your minivan with a pop-top, allowing you to stand upright and giving you another area for sleeping. GTRV is one company that does install pop-tops on minivans, but currently only puts them on the Toyota Sienna.
For Those That Want A Full Build But Are Not The DIY Type
There are endless ways to build out a van with no required tools. Such as using cots for beds or plastic drawers and wire shelving for storage. Zip ties and bungee cords will become your best friends when doing a no-build.
But if you want something more #minivanlife looking and have the financial means for that Instagram-worthy look, you might want to consider buying a pre-built minivan conversion kit. There are many companies out there. Here are a few I found while researching for this post.
- GTRV makes what they call the Sienna Weekender, complete with pop-top. You do need to take your van to them for this one!
- RiverLeaf is a USA company that makes InstCamper boxes in several models that can be shipped to your home and installed by you with minimal building skills needed. And they are AWESOME; my favorite is the Arches package. There are so many great things about these builds, one being that they require zero modifications to your minivan. That means you can still use your van to transport all the passengers you need it to when you need to.
- Vanpackers is a Canadian company that makes conversion kits for all types of minivans and you can add refrigerators, stoves, and other upgrades. These models can be installed in 5 minutes and made to fit your exact type of minivan.
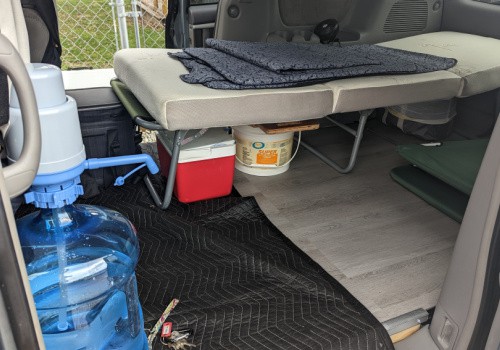
A Few Questions To Ask Yourself Regarding Your Camper Van Conversion
Do you need your van to convert back and forth between daily driver mode and camper mode?
What is your camping style? Do you prefer boondocking on BLM land or staying in established campsites with amenities?
How many electronics will you be bringing along? This will help you decide what type of power solution you need.
Is a place to sit and a dining table of some sort necessary inside the van or can they be a fold-and-store style set?
What activities are you planning to do during the day? If you need supplies for those activities, where will you store them?
What amenities are deal breakers for you? Do you need a toilet? A way to shower? A place to sit inside that isn’t the bed?
Does getting the most mpg out of your vehicle matter to you? If so, you will probably not want to add a roof rack and a hitch cargo carrier.
Would you rather have a rear-access kitchen or a slide-door access kitchen?

Video Examples Of Minivan Builds
No-Build Kia Sedona Minivan Camper Conversion
Dodge Grand Caravan Stow N’ Go Build
Honda Odyssey Camper (with L Shaped Couch in day mode)
Chrysler Town and Country build for one
I hope you now feel prepared to build your minivan camper and get out there and explore.
If you sleep in the back of your vehicle instead of a self-contained RV, you don’t qualify for a Boondockers Welcome or Harvest Host membership, but you can use Hipcamp to find unique campsites. Check out our post about our first time using Hipcamp. (spoiler alert, it wasn’t our last time using Hipcamp).
You can actually get shades or whatever you want to call them to fit all of your windows made for your make and model. I just “goggled” it and got a set of 8 for my 2020 Grand Caravan for less than a 100 bucks. They are the mylar, plastic bubble type and fit perfect. Complete privacy and great insulation.
Thanks for leaving this tip!
Depends on the make and model of your minivan. Window coverings aren’t necessarily available for all vans, especially older models.
Thank you for the information on window shades. Are you still having fun?
Yes! My son totaled this minivan (he is okay). So now we have a slide-in pop-up truck camper and LOVE it!
The link for window screens only goes to the pull over screens. Where did you find the small top of window screen shown?
Those are gutter guards bought at Lowes and cut to size.